Walkthrough
Add and upload your first canvas record
Create a sample Contact on the canvas, enter its details, and upload it to Salesforce. Each record appears as a card that you can open and edit before uploading.
Before you begin
Open the canvas and check the Salesforce connection in the upper-right corner. Use a sandbox or another org where you can create a sample Contact. If you have not connected yet, complete Connecting a Salesforce org first, including any package setup requested during connection.
Your connected Salesforce user needs permission to create Contacts. In a Team workspace, you also need the Upload to Salesforce feature permission from a workspace admin.
Start with an empty canvas so the upload includes only this sample. If needed, open Canvases at the top and choose + New canvas; save any work you want to keep first. The Contact remains a draft—a record prepared on the canvas but not yet created in Salesforce—until you confirm the upload.
Step 1: Add a Contact draft
- Click Add records in the upper-left corner and choose Add a blank record.
- On the Add a record card that appears, click Create new record.
- Type Contact in the object search, then select Contact from the results.
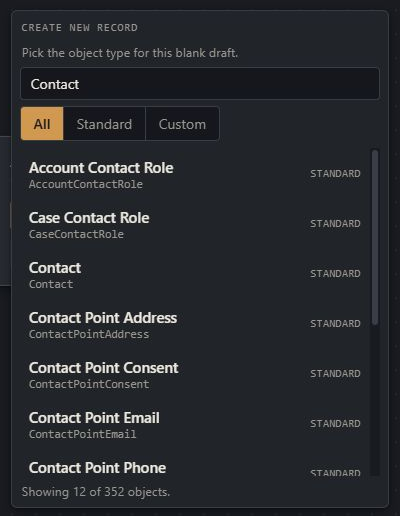
A Contact card appears with a DRAFT label and no name yet. You have not created a Contact in Salesforce at this point.
Step 2: Enter the Contact's details
Double-click the Contact card to open its editor. Enter Quick Start Contact in Last Name and fill any other fields your org requires. Required fields are marked with an asterisk (*); your org's fields may differ from the example. Click Save draft to keep the changes on the canvas.
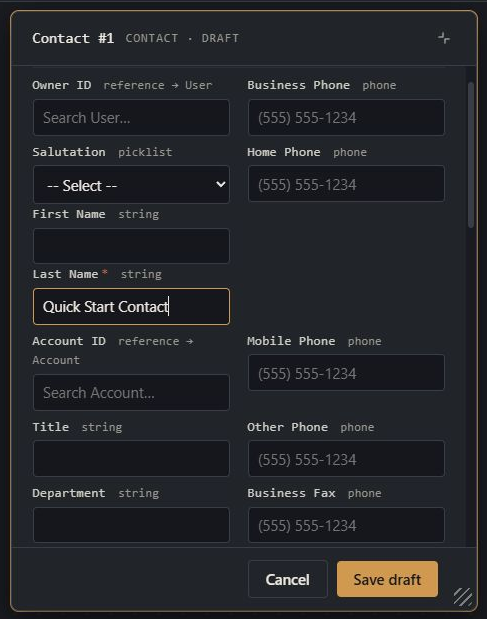
The card now shows the name you entered and still carries the DRAFT label. Save draft updates the card; it does not upload the Contact or save the whole canvas for later.
Step 3: Upload and check the result
Click Upload to Salesforce in the upper-right toolbar. The upload dialog checks the draft before you proceed. For this example, confirm it lists one Contact. If it reports a problem, cancel the dialog, correct the draft, and open the upload again.
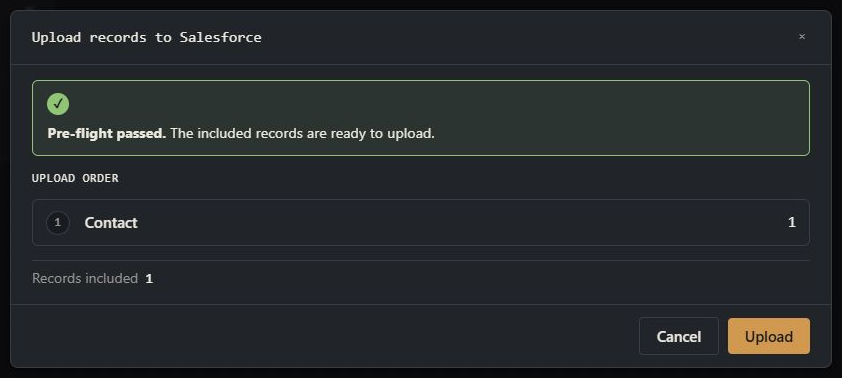
Click Upload in the dialog to create the Contact in Salesforce. Wait for the result: Salesforce can still reject a record during the upload, in which case the result explains what needs correcting.
After a successful upload, click View in Salesforce beside the Contact in the upload results. Confirm that its name is Quick Start Contact. Back on the canvas, the card is no longer a draft: it represents the Contact you just created.
Optional: Save the canvas for later
Click Save canvas, enter a name, and click Save. You can reopen it from the Canvases dropdown at the top. Saving preserves your canvas layout and contents; it is separate from uploading changes to Salesforce records.
You can also save before uploading if you want to finish later. Saving a canvas containing this draft does not create the Contact in Salesforce.